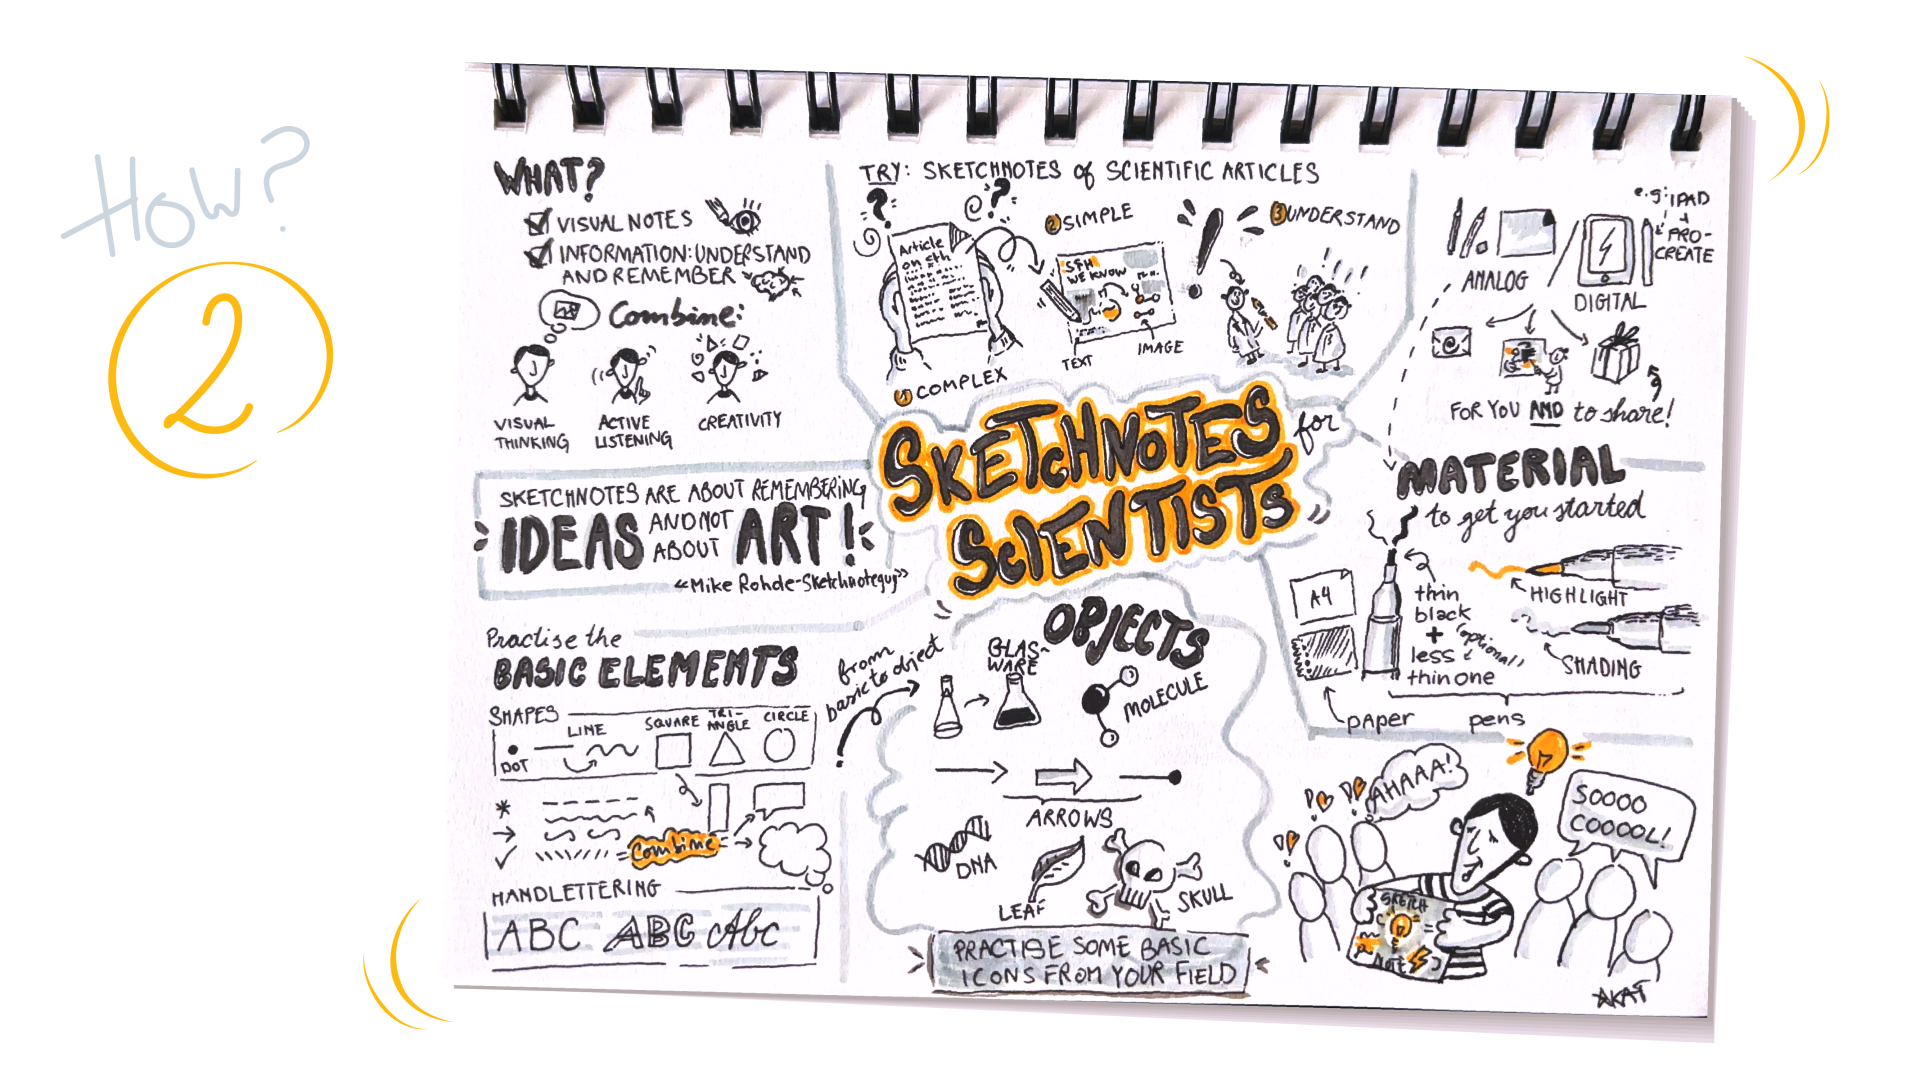
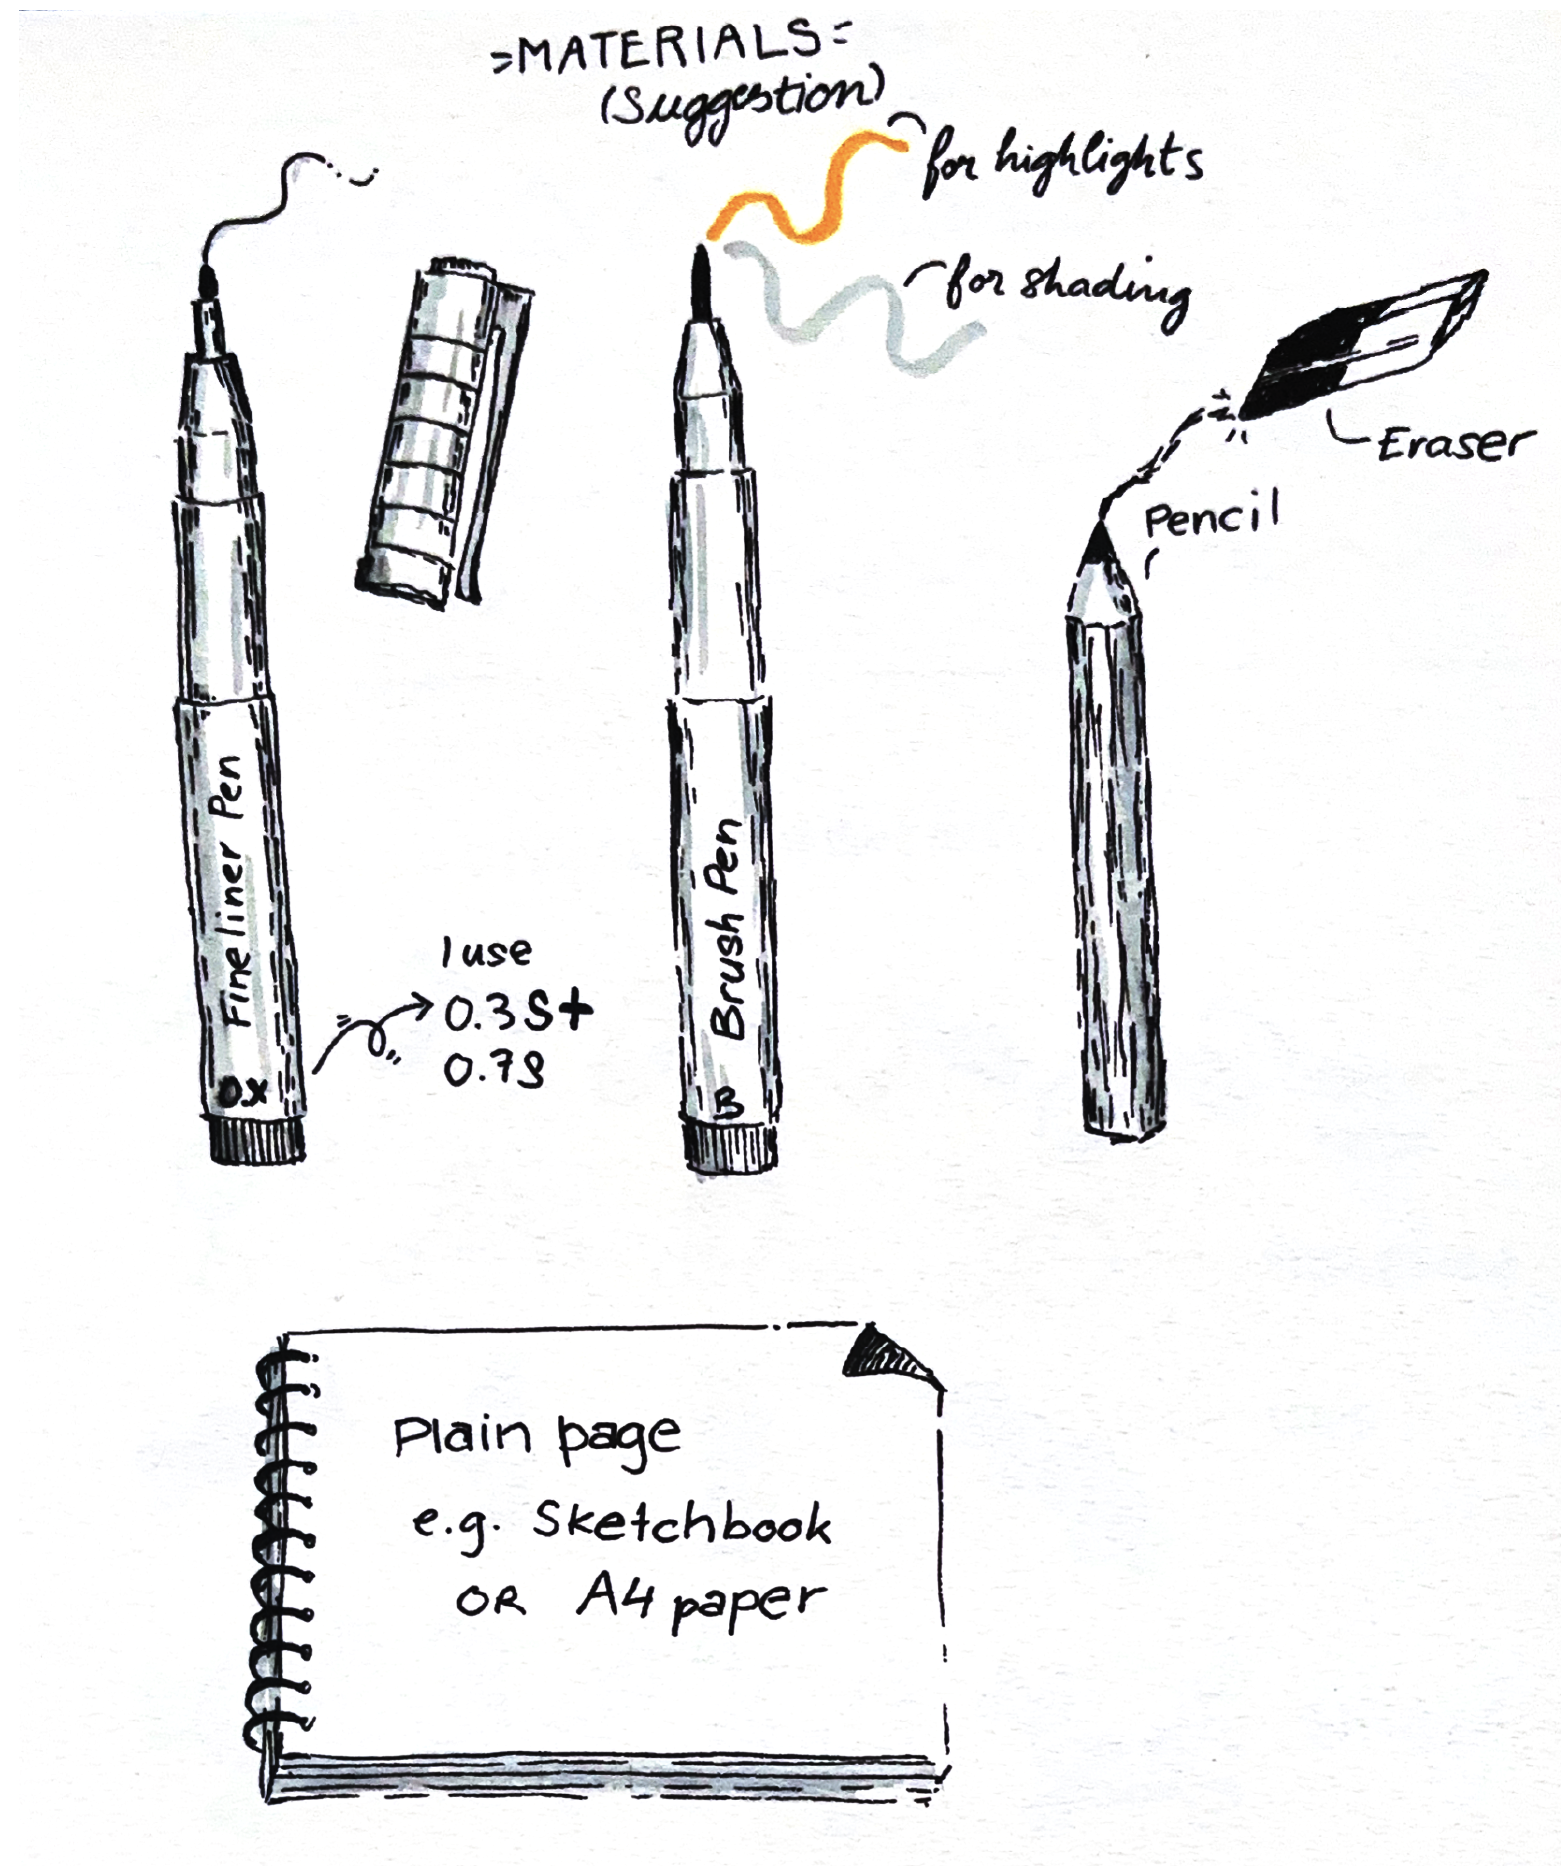
What you need: materials and a mindset
Let’s start with tools. The basic analog setup is super simple:
- A plain sheet of paper (I like A4 white pages) or a sketchbook
- A thin black (gel) pen for writing and sketching (having both a fine and slightly thicker one can be helpful)
- One- or two-colored pens that you can use for highlights (I often use yellow-orange or a strong, saturated blue, but you might prefer red, pink, turquoise... all up to your gusto)
- Optional, but a nice-to-have: a grey (brush) pen for shading
- A pencil and eraser (useful for sketching out your layout in advance)
That’s it! Easy! You probably already have most or everything you need.
Nowadays, I’ve shifted to working digitally. I use my iPad and pencil with a pixel-based drawing app like Procreate. It makes it easy to edit, move things around, and export high-resolution versions for printing or sharing. But honestly, I still enjoy sketching on paper now and then.
Whether you go analog or digital, the most important thing is to keep it simple, clear, and fun.
Some practice to get started
Before diving into full sketchnotes, it is useful to practise and build some basic skills. And if you doubt your drawing skills, don't worry, sketchnoting is less about artistic talent and more about clear visual communication. The exercises I suggest here help you focus on drawing, hand-lettering, and layout. That way, when you work on your sketchnotes, you can fully focus on content and less on the technical realization of the drawings.
Exercise 1: Warm up with basic shapes
Sketchnotes are built on simple forms: lines, dots, circles, triangles, and arrows.
Take a pen and paper and train your hand-eye coordination:
• Draw basic shapes like circles, squares, arrows, straight and wavy lines, and fill the whole page.
• Combine shapes to sketch basic icons, for instance, create a heart, light bulb, beaker, or molecule.
Repeat, repeat, repeat to build muscle memory.
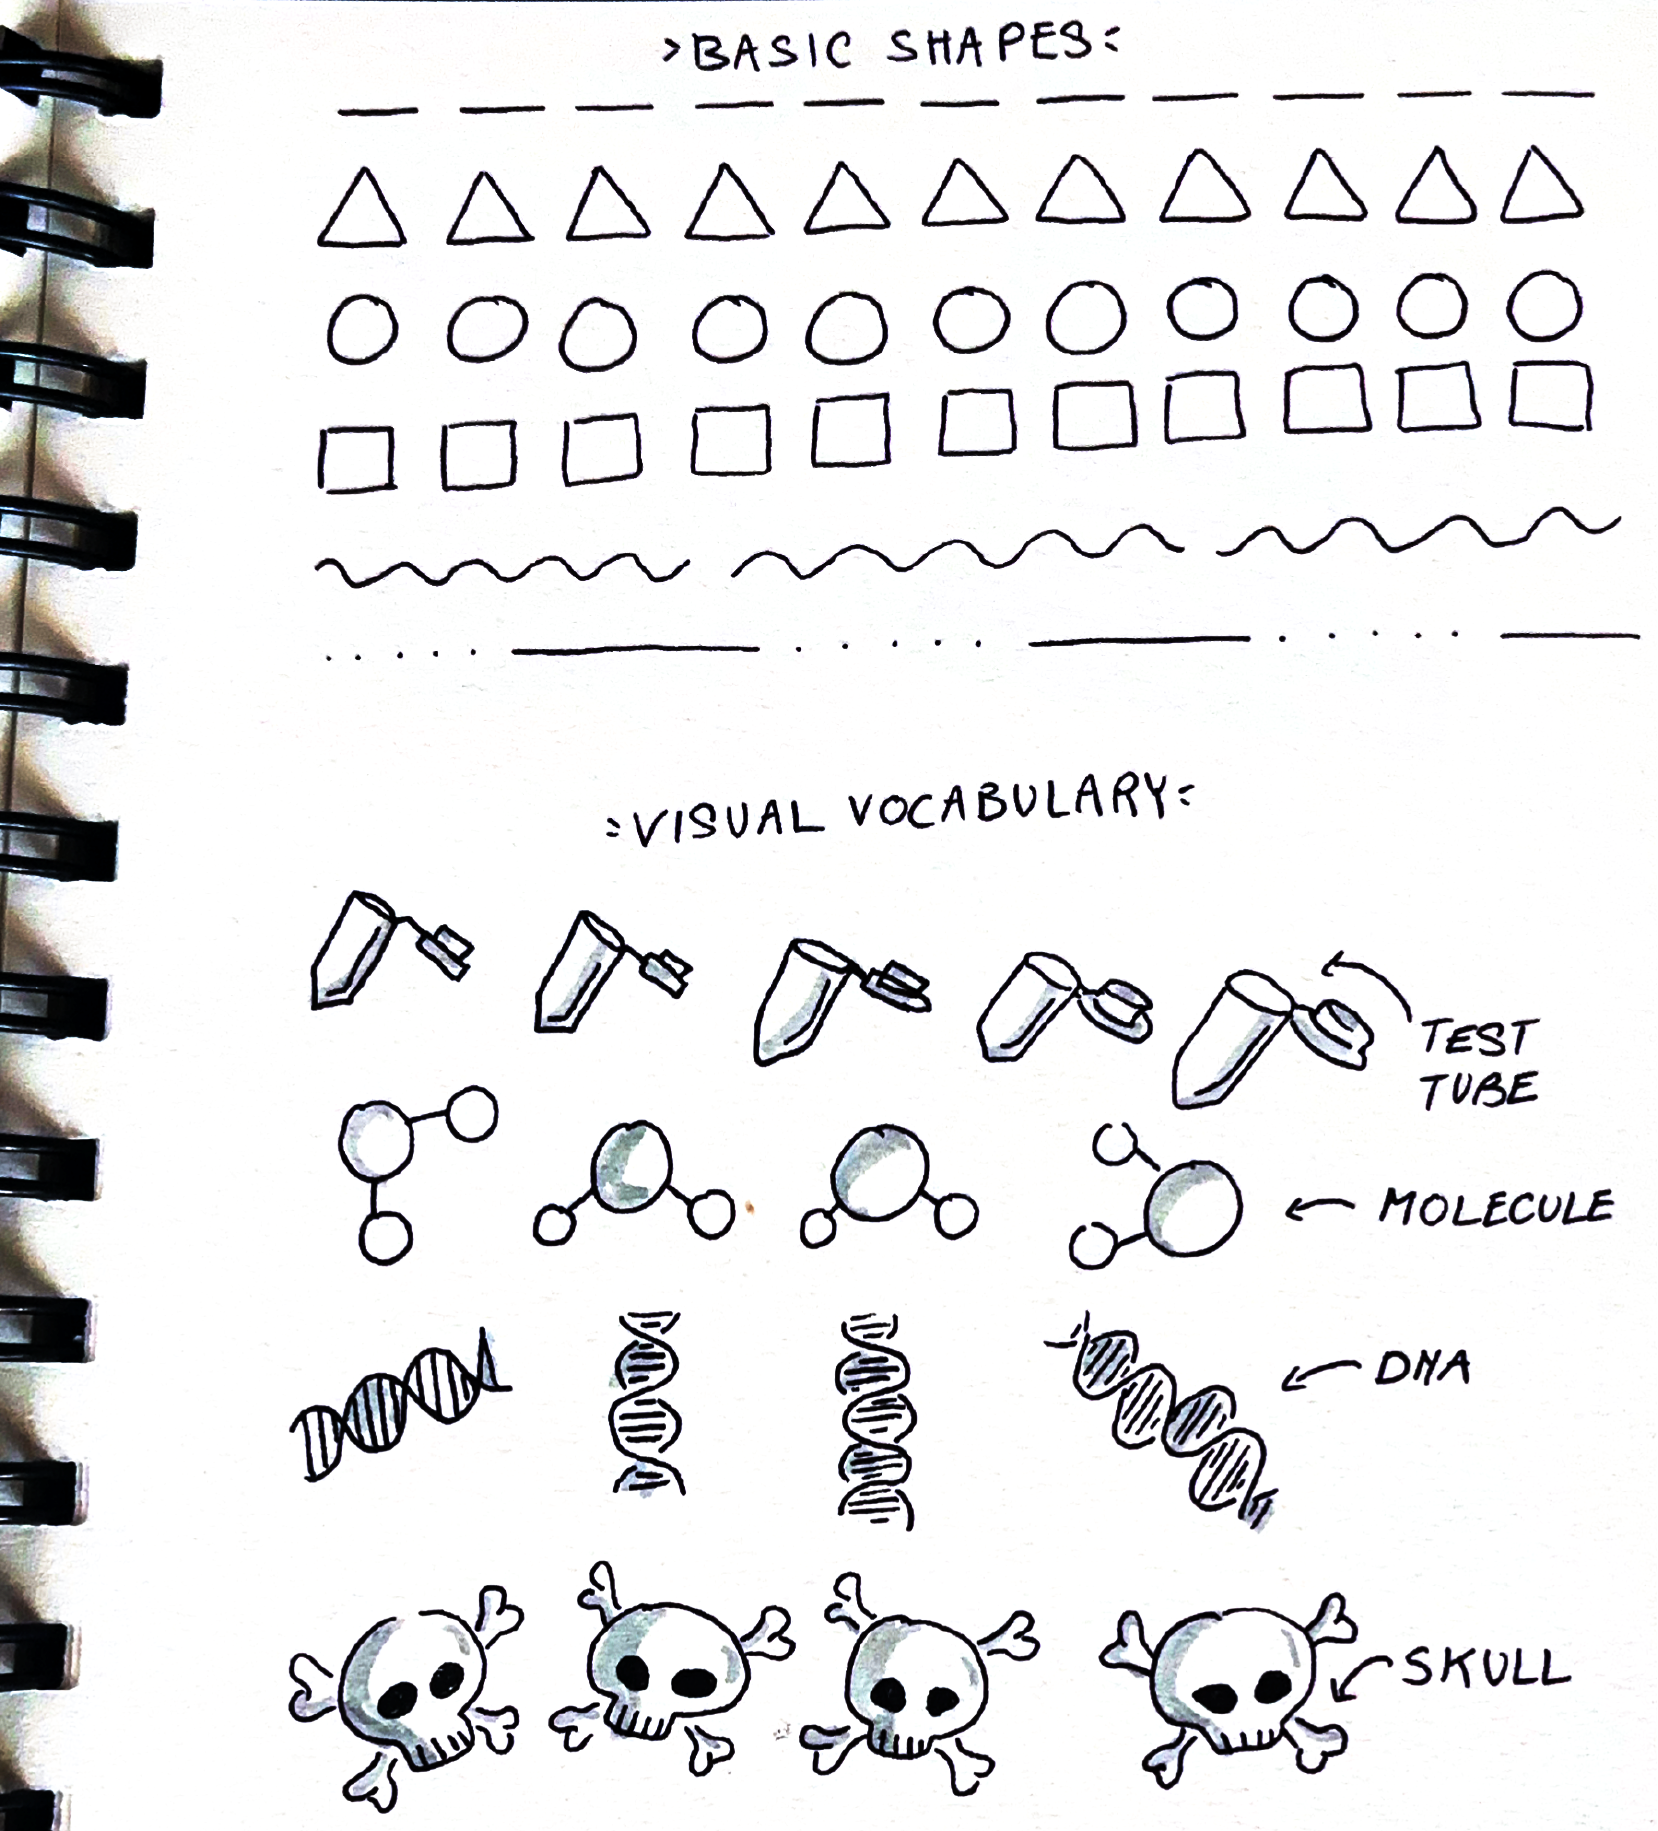
Exercise 2: Build your visual vocabulary
In sketchnotes, we use simple visuals, and the more familiar you are with drawing them, the easier and faster sketchnoting will be for you. A good practice and also preparation is to build up an icon library. You can start with ideas and objects that come up often in your field. Is it possible to turn any of them into simple sketches or visual metaphors? Often, images are hidden in the words or language we use. Try to spot them and start drawing.
A few ideas for you:
• A DNA strand, a microscope, a laser beam, or a pipette
• A graph, skull, warning sign, or thumbs-up
• A figure in a lab coat
• Emotions like curiosity, confusion, excitement, or that classic Eureka! moment
Tip: Keep a small notebook and sketch whenever you have a minute. While your lunch heats up, during your commute, or in the evening while relaxing on your couch. Every little drawing session adds to your own visual library.
Even better: turn a team coffee break into a 10-minute creative doodling session. It’s fun, relaxing.
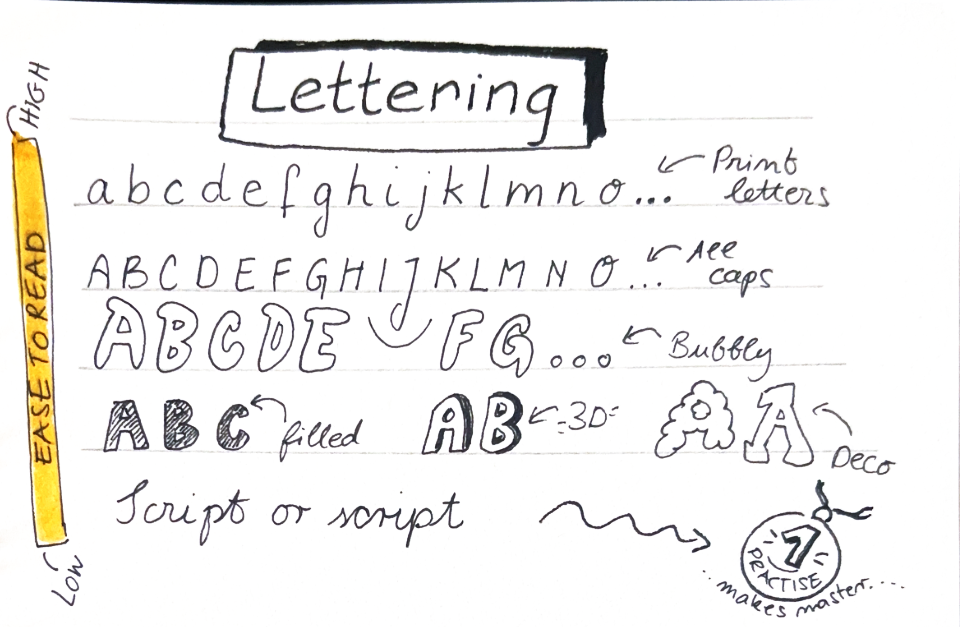
Exercise 3: Practice clear lettering
Handwriting can be a nightmare to decipher; therefore, legibility matters a lot. Even more than a nice style.
• Write the whole alphabet in all caps.
• Practice a few words in cursive writing, focus on fill words like for, and, because
• Play with height, width, and use different pens to see how it impacts.
Tip: Don't rush, slow down. Intentional writing always looks better, and once you feel more in control, you will automatically get faster.
All caps are nice, as letters are evenly spaced, but take longer to write. I often use cursive writing for fill words, not only for its decorative effect but also because it is faster for me.
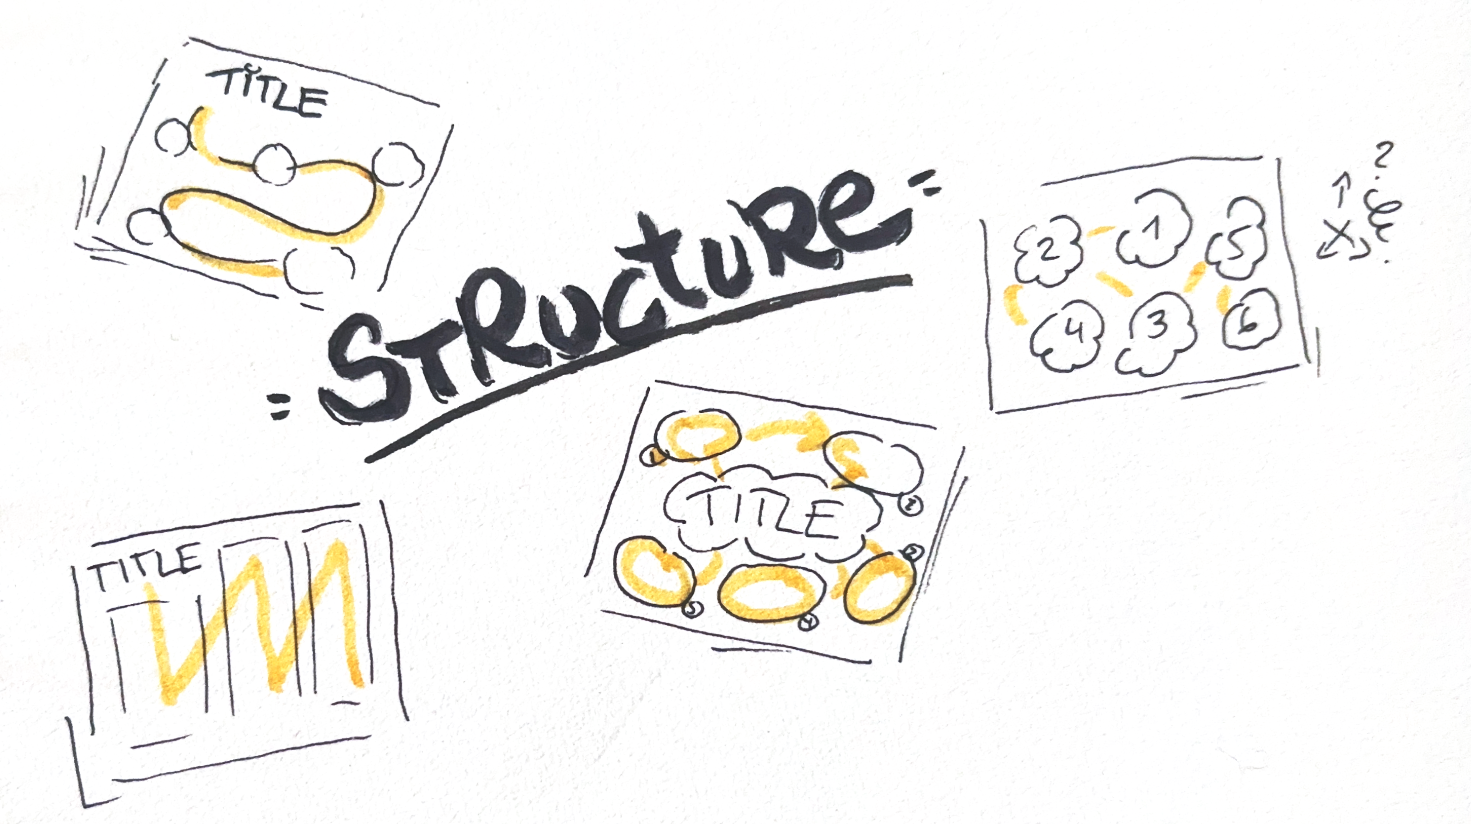
Exercise 4: Explore layouts
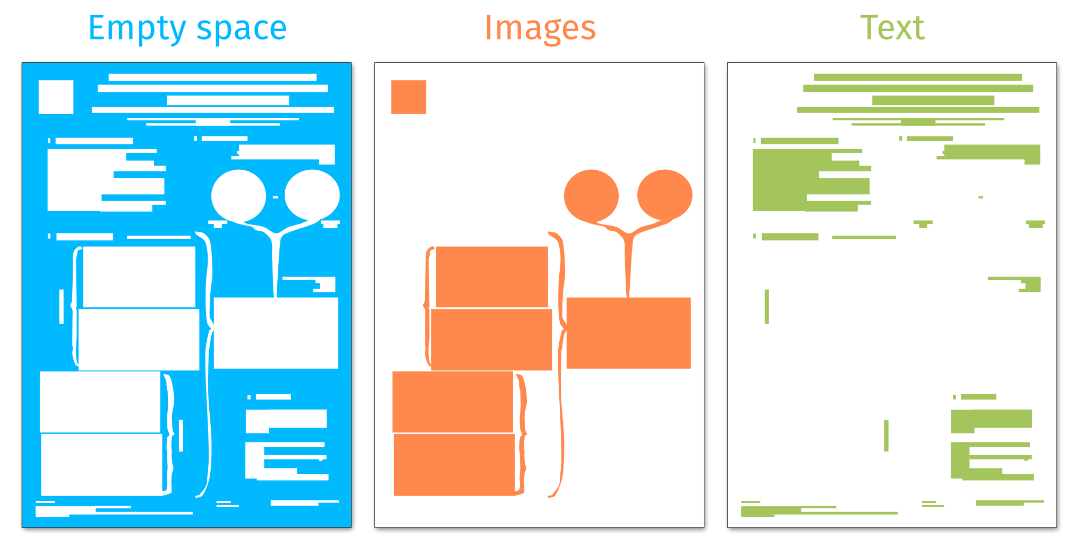
The real challenge of sketchnoting isn’t just how it looks, but how it communicates. A strong layout can emphasise the flow from one idea to the next.
Try this:
• Divide your page into different sections (e.g., intro, methods, results) and play with different layout forms.
• Use arrows and boxes to guide the eye.
• Leave white space and don't overcrowd the page.
• Also consider a clear visual entry point (help with highlighting colours or work with bigger sizes) and a clear exit point. Don't lose the reader.
Tip: Sketch a rough layout first, as it reduces the risk of running out of space or having a funny order of elements.
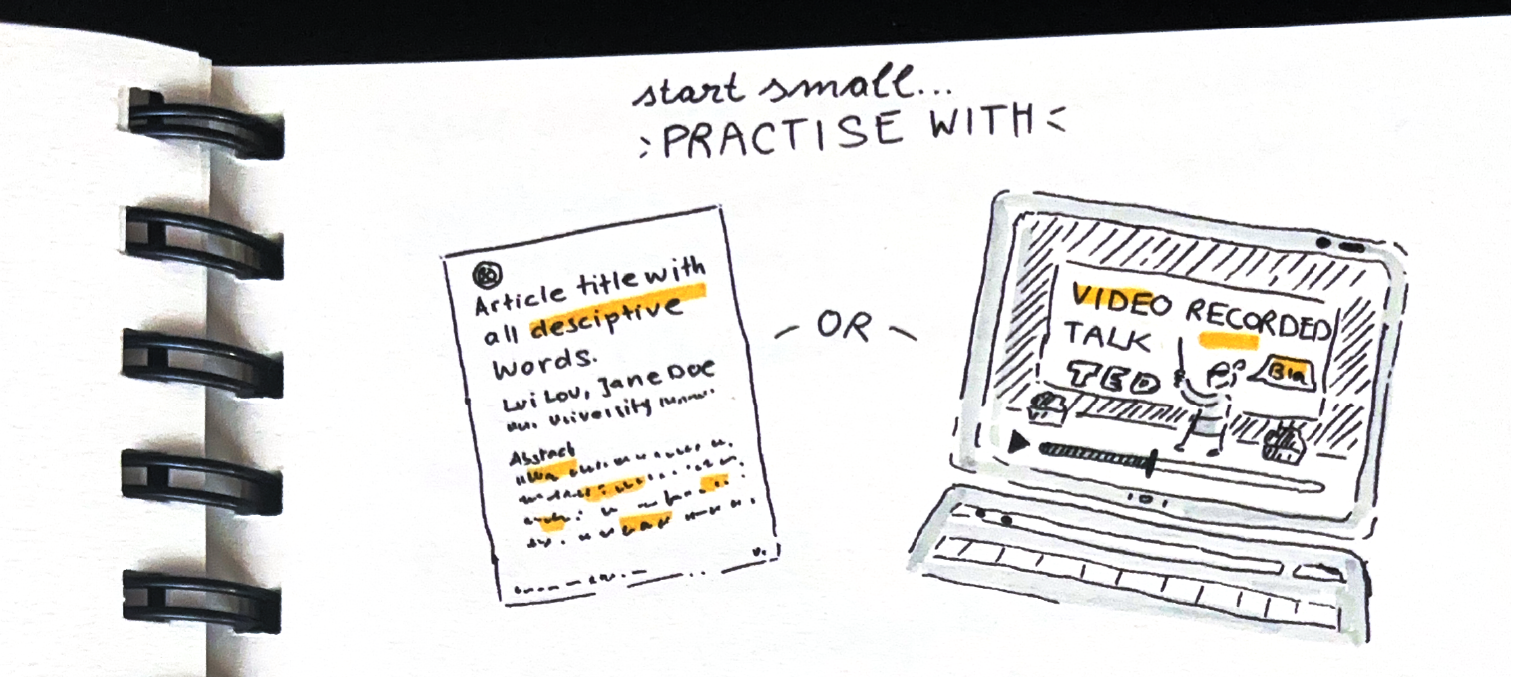
Try a mini-sketch from a talk or abstract
One good practice is to pick a video of a talk, for instance, a TED talk on an interesting topic could be a fun start. Or maybe the easiest is to pick a title and abstract from an interesting article. Listen or read through once, then pause.
Ask yourself:
• What is the main message?
• Are there any visual metaphors or images that pop into your mind?
• What could I sketch to explain this to someone else?
• Can you think of a short descriptive sentence?
• Do you need to add arrows or boxes to guide the eye and give structure?
Then give it a go! Sketch a simple visual summary; it doesn’t have to be perfect or pretty. What you want is to give a clear idea and a summary of what it is about.
You have now created a type of graphical abstract, and that is already your first sketchnote.
And now let's move to a full article (or talk). Read more deeply, identify the key sections (background, methods, main findings), and sketch a layout. Maybe you’ll box each section. Maybe you’ll connect ideas with arrows or wrap everything around a central image.
The nice thing is that you can let your imagination flow. Allow yourself unconventional ideas and let your mind translate the science into something you can see and relate to.
And don't be too strict with yourself, sketchnotes don’t have to be perfect. They don’t have to be “art.” They are about thinking visually, clear communication, and having fun with ideas.
We’d love to see what you create! Share your sketchnotes with us on social media. Let’s celebrate and appreciate the art of sharing science stories through visuals!