A quick look at the dropdown font menu on your text
editor of choice or a visit to Google fonts can give you a fair idea
of the number of fonts that exist nowadays. An overwhelming amount. A
closer look allows you to notice that many of them are quite similar to each
other, and that’s because they belong to the same typeface. A typeface
is nothing but a style, a big family that includes many fonts under its
umbrella. There are six main typefaces that you normally encounter when working
with text editors: serif, sans serif, slab serif, handwritten, script, and display. They
are all designed to be used in specific circumstances, depending on the goal of
our text. It is unlikely that you would pick a font from the display typeface
to write an essay.
While we don’t necessarily feel the need to personalise most of the existing fonts, as they are designed to be impersonal, for handwritten fonts this is different. As the name might suggest, these are designed to imitate someone’s handwriting, but who is this someone? What if that someone is you, and you want a handwritten font that looks just like yours? Let’s take a small step back.
While we don’t necessarily feel the need to personalise most of the existing fonts, as they are designed to be impersonal, for handwritten fonts this is different. As the name might suggest, these are designed to imitate someone’s handwriting, but who is this someone? What if that someone is you, and you want a handwritten font that looks just like yours? Let’s take a small step back.
What is a handwritten font and what can you use it for
Handwritten
fonts are designed to imitate a person’s handwriting and are usually simple and
playful. When it comes to science communication, I find handwritten fonts to be
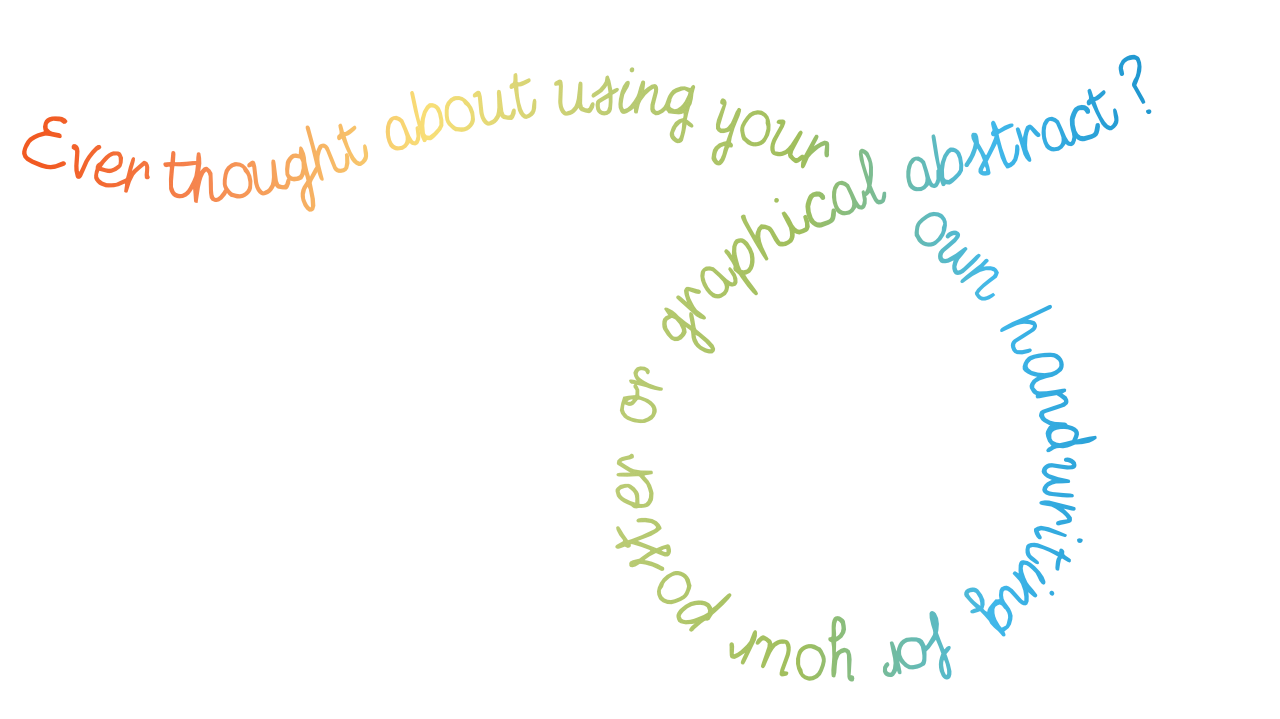
very useful for labelling figures or visuals (see what I did here). They are perfect for text that is only one or a few words long and
can be made quite large without grabbing too much of the attention, as normally
it has a small weight (thickness of the lines in our font). It could
also work for headings and titles in posters, depending on the overall style.
Why make your own handwriting font
Creating a handwritten font is not only fun, but it will also result in a font that you can use in your posters, graphical abstracts, or even presentations. So, circling back to the question “what if you want a handwritten font that looks just like yours?” Well, today’s your lucky day! In the rest of this blog post I will explain how you can make your very own handwritten font. It will be a font that is yours and yours only (and of whoever you choose to share it with), and will add a personal touch to anything you will design/produce!
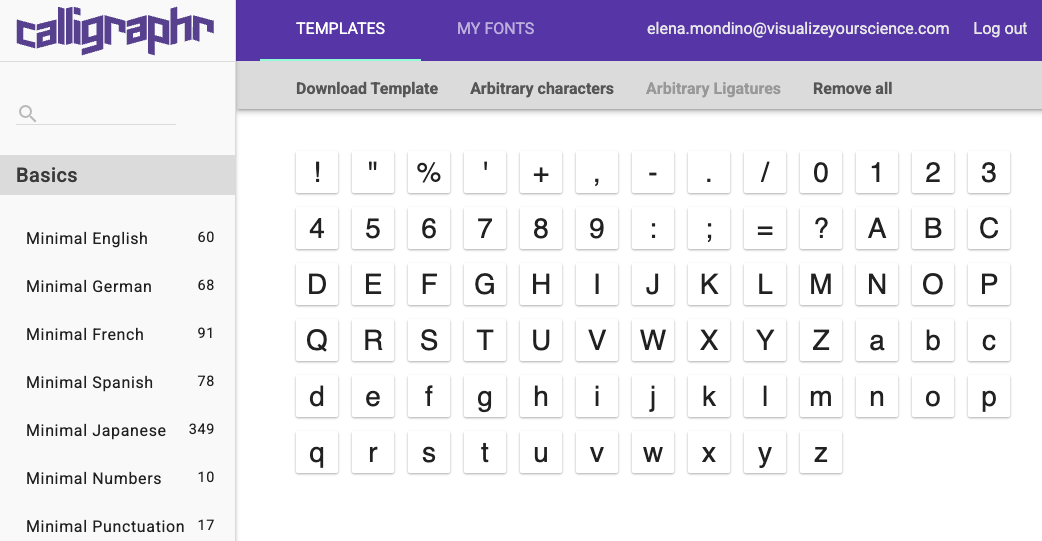
The tools you need
A
few months ago, I got the idea to create a VYS handwritten font that we can use
as a company on our website and social media. A font which is unique and our
own (i.e., we own copyrights) and for which we thus don’t need to worry about
purchases or usage rights. But how does one do this? Create a font? I explored some
options on how to approach this and found that the software Calligraphr could be
a good starting point. There are other options out there, such as the scriptscript
tool from Schultzschultz, for
instance, but this post will focus on Calligraphr and my personal experience
with it.
To get started, you will need:
Note: it is possible to do this without a tablet, in which case you will need a printer and scanner (sic).
To get started, you will need:
- Calligraphr account (free version available, with some limitations)
- Tablet with pen (such as an iPad, a ReMarkable, or similar)
Note: it is possible to do this without a tablet, in which case you will need a printer and scanner (sic).
The process
Step 1.
Step 2.
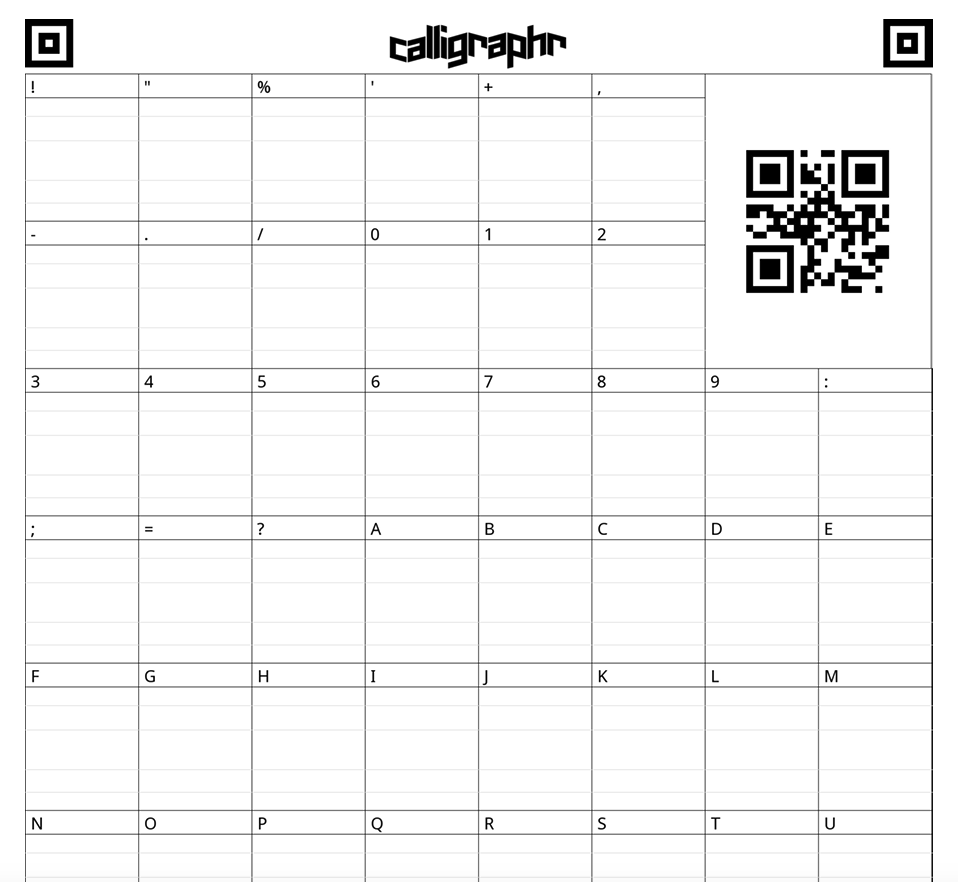
Step 3.
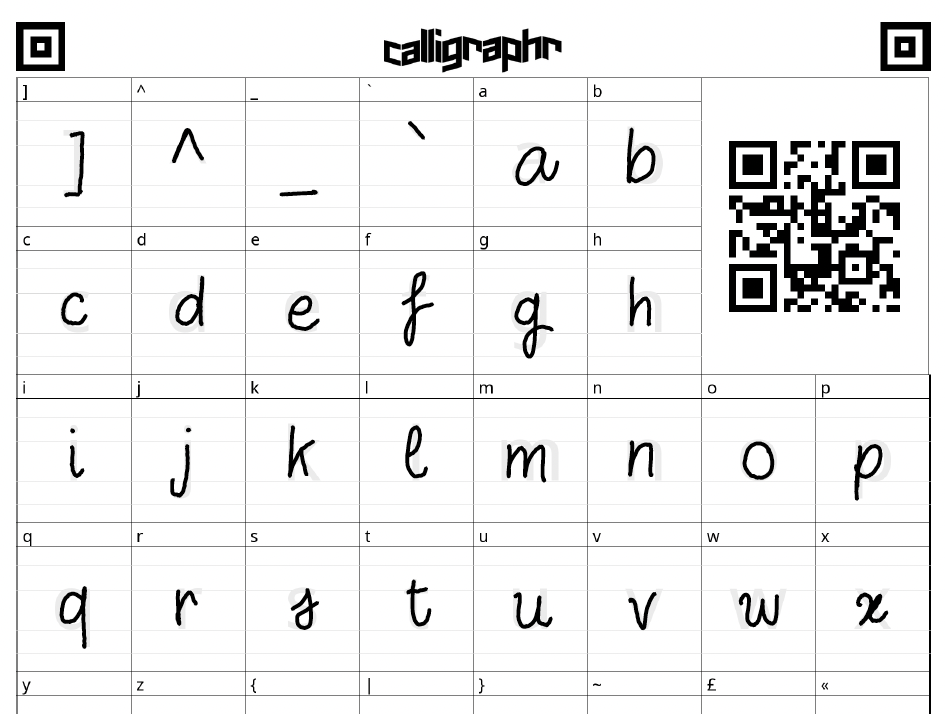
Step 4.
Step 5.
Pros & Cons
Pros
Cons